Tuesday, December 17, 2013

Smocked Tunic from Simplicity 1596

The mad rush for finishing Christmas gifts……..  DONE!


I decided to make my niece a smocked tunic for Christmas.  
It was started in October and finished last week.


Smocked Simplicity 1596

Pattern:
Simplicity 1596, size 8
Easy to sew and adapt to a smocked tunic.  
Issues with the pattern: the seams for the ruffle at the bottom of the dress and the neckband was too short and too narrow.  
The pattern calls for 4 sections on each ruffle.  This leaves a seam in the front of the dress.  Cut it in two pieces and you don't have to see the seam in the front.  
I had to recut a new neckband due to the original being too small for the dress.

The smocked insert was made by pleating a section of fabric and then adjusting the pleats to the size of the pattern insert.  The smocking design was original and made to match the trim.

Fabric:
Poly/cotton chambray and Fabric Finders pink/white gingham.  
(Forgot how unforgiving poly/cotton can be when eased into tight areas.)

Close-up of the smocking

Smocked Simiplicity 1896

My internet absence could be due to four kids on four different basketball teams or the water damage to my kitchen.  Take your pick, everyday has been FULL from Thanksgiving until Christmas.

New Kitchen Project thanks to overflowing toilet.

Sunday, December 1, 2013

Another go on Butterick 5913 = A Winner!

Butterick 5913

Pattern:
Butterick 5913, view C
This is the second top from the pattern.
I added about 3" to the bottom of the top.  
Wonderful fit!!!!

Fabric:
Rayon jersey knit in purple and white tie-dye from High Fashion Fabrics.
This fabric is so soft and cuddly.  Wish I had bought more to make PJ's.


Butterick 5913

Tuesday, November 26, 2013

Thankful Fairies


Thanksgiving girly craft - Thankful Fairies

My sewing "sweeties" were back for a Thanksgiving craft.  We made our own version of Forest Fairies to use for Thanksgiving.  Craft supplies were purchased at Hobby Lobby.  

Fun Stitch Studio has published a few kid's sewing and craft books in the last year.  
WONDERFUL BOOKS!  
We used Forest Fairy Crafts by Lenka Vodicka-Parades to inspire us to make these Thankful Fairies.  

If you have a 8 - 12 year old girl to enjoy, these books make a wonderful afternoon of crafting and sewing.  

Forest Fairies as Thankful Fairies
1st Thankful Fairy

2nd Thankful Fairy

Glueing on the head!

3rd Thankful Fairy

Have a great Thanksgiving!


Monday, November 18, 2013

Comfy Tunic, Simplicity 1543

Simplicity 1543

Pattern:
Simplicity 1543, a Patty Reed Design tunic.

Fabric:
Organic cotton jersey that is soft as butter.  

Construction:
The one item that makes this tunic stand out is the beautiful topstitching around the neckline and at the pockets.  Topstitching cotton jersey isn't for the easily discouraged.  After a few trials, I found the best solution was iron-on stay tape stabilizer on the underside of the fabric and a topstitching needle in the machine.  After solving those issues, everything is smooth sailing.

Fit:
This top was made after I spent time making my own sloper.  BUT, I figured that since it was so loose, who needed to match up my sloper.  WRONG THOUGHTS!  If you look at the above picture, you can see wads of fabric around my shoulders and underarms.  When I pin this extra fabric out, it slims the tunic and I look great.  

Lesson learned:  I am not a rectangle.  

The last picture is where my sloper is laid under the tunic pieces to check fit.  I need to take out a SERIOUS chunk in the shoulder seam.  I feel very challenged to make another tunic and master the fit on this great top!

I did find a great article on Threads about pattern selection.  Love it!  The article's first point is about patterns that have many straight seams.  
We do not have straight body parts, so why would I think it would fit!

Sleeves on Simplicity 1543

Drawstring sleeves.

The pattern piece overlap is where my shoulder seam should go.  I regret not making this drastic change to the pattern.

Sunday, November 10, 2013

Diary of a Fit Fanatic, Sew Serendipity Dress


After going to the trouble of making my own sloper, I promised myself to not let anything into my wardrobe that didn't fit.  I am tired of tugging and pulling on my shirts and dresses to get them arranged correctly on my body all day long.  Easy promise to say, but hard to implement.  

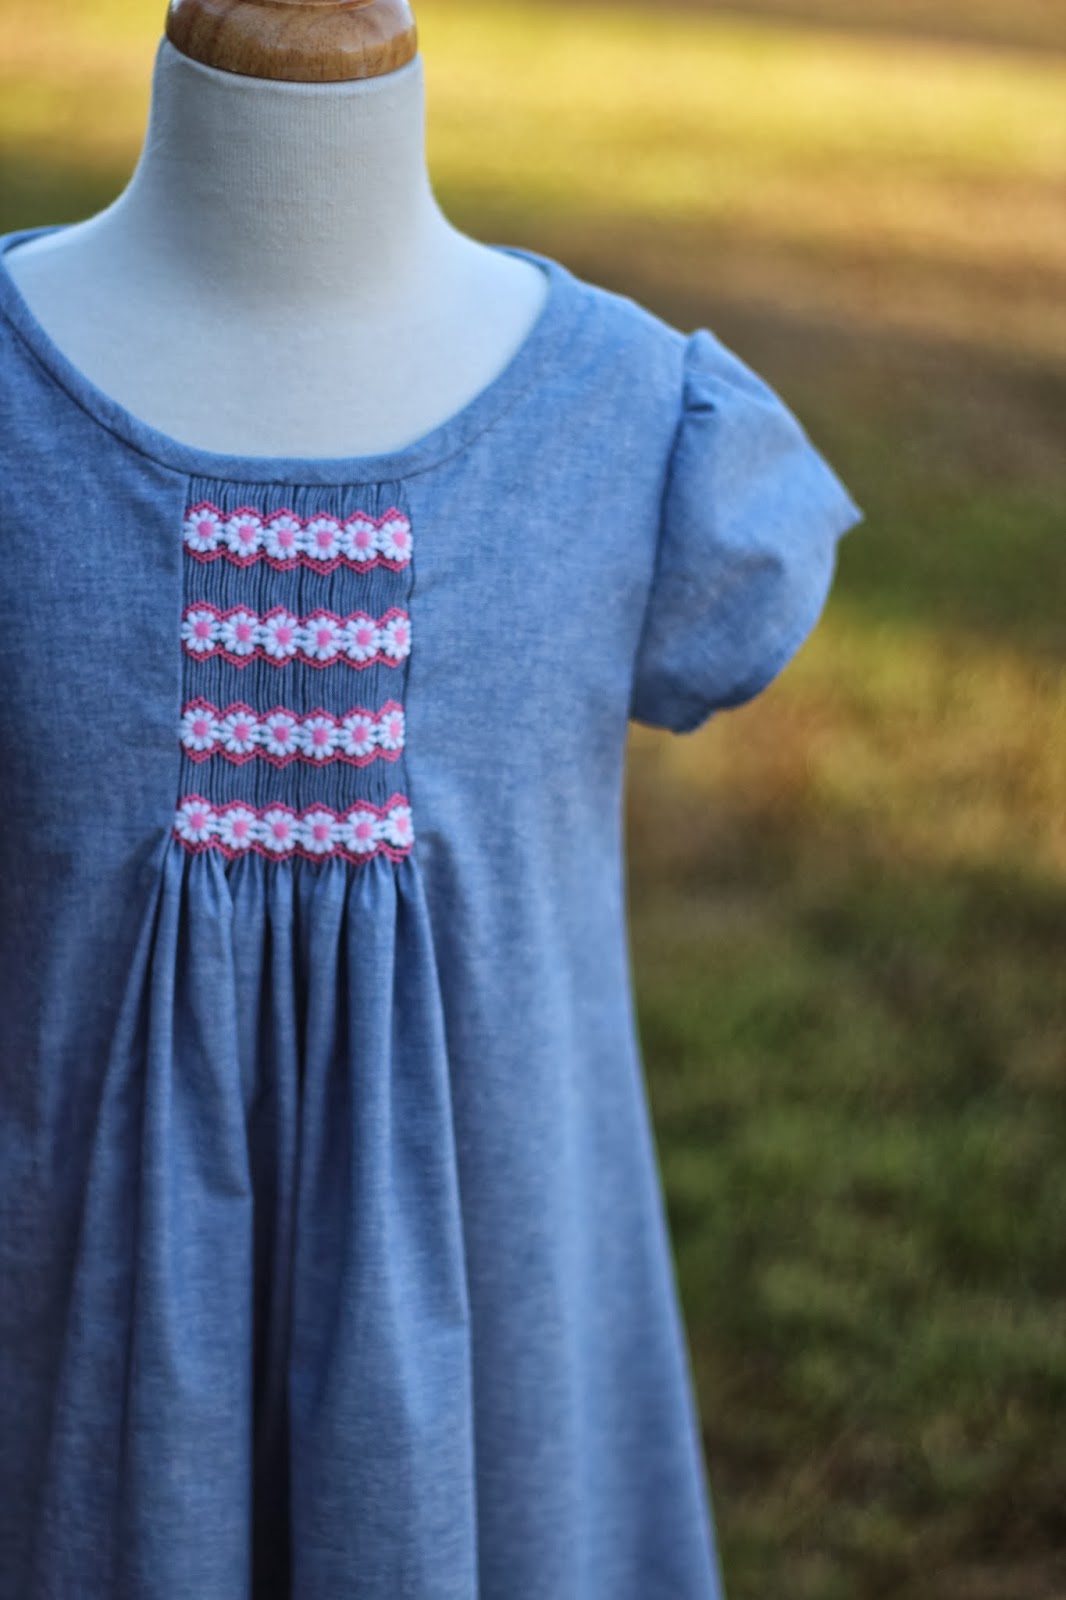
This is Sew Serendipity's Dress from Kay Whitt's book, Sew Serendipity.  I did have a head start on this dress, I had made it before.  It fit well, but I had some shoulder and back issues with it.  (I have sloping, uneven, and forward rotated shoulders.)  The first dress ended up having about 1 1/2" of elastic gathering the whole sleeve at the neckline and a gapping front at the bottom of the bodice gathers.

Sew Serendipity Dress

Amy Butler "Love" fabric

Back view
1st Sew Serendipity dress

So, I started with the original pattern and added a full bust adjustment and adjusted the shoulder point forward in the sleeve.  


1st Muslin

Second muslin, took out some of the fullness in the bodice.

2nd Muslin

Third muslin, Took out fullness in the shoulder area and back.

3rd Muslin

3rd Muslin

Fourth muslin, took a dart in the armseye and and added length to the sleeve cap.

4th Muslin

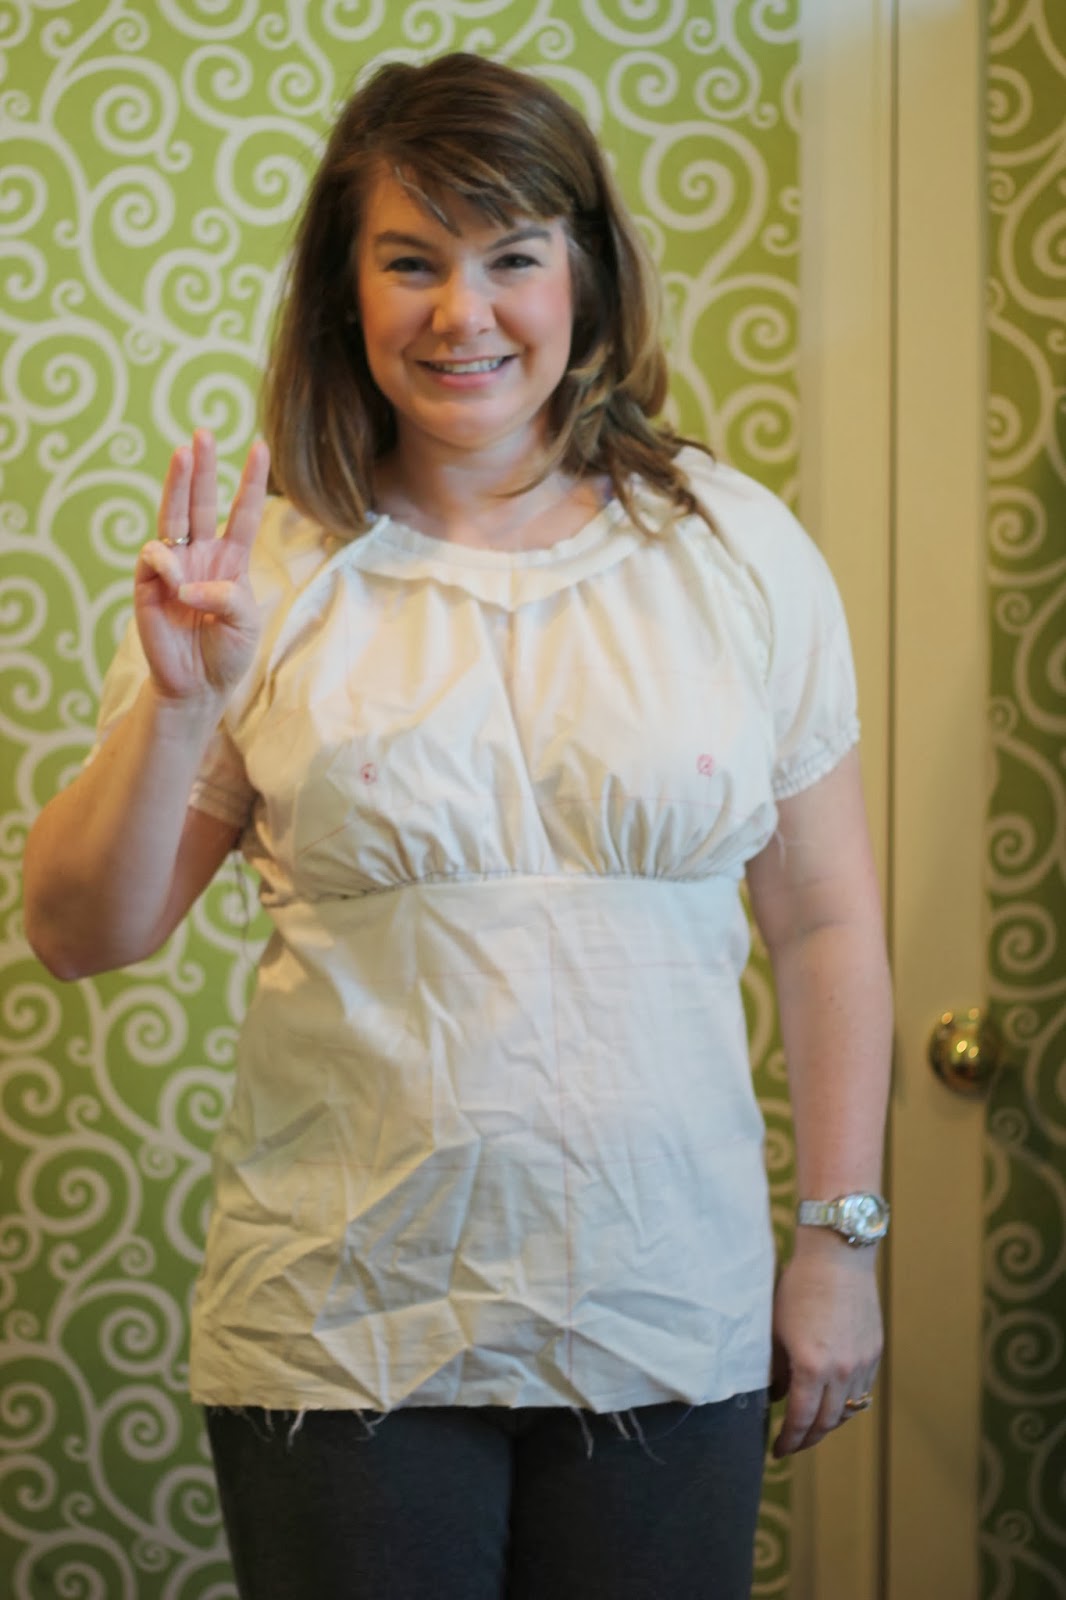
Fifth muslin, seemed pretty good!  Bust points are in the correct location, shoulder points match and all the grain lines were straight.

Add caption

Pattern:
Sew Serendipity dress from the book, Sew Serendipity. 
(Great pattern, don't be scared by my need for perfection.)

Fabric:
Amy Butler "Love" print from my favorite "fabric eye candy" stash.  I kept thinking something would turn up to add as an additional print for this dress to break up the print, but could not find anything that looked good with the plum.  So, I used the print by itself.  It looks a little plain, but a string of pearls added a little distraction.

Construction:
After five muslins, I could sew this dress in my sleep.

I was excited after the fifth muslin, I had a good fit.  I cut out the dress and sewed it up to the point I could try it on and IT WAS WAY TOO BIG in the bodice and skirt.  So, I debated and sulked and then took out the front bodice (mind you there is a side zipper.)  Cut a new front bodice (Number 6, if you are counting).  Put it back together.  STILL TOO BIG.  So then I added a bust dart to the arms eye and called it done.  In the end, I think it was the fabric that kept stretching as it was sewn.  (Lessons learned.)

Fit:
I wore the dress today and I never once tugged or pulled on it.  It fits well and never moves out of place.  SUCCESS!

I have a better feel for what a raglan sleeve pattern piece looks like for a person with sloping, uneven, and forward rotated shoulders.

I have returned to Joann's to buy another bolt of muslin.  

One might say I am patient or stubborn depending on how much you appreciate this fitting exercise.

I changed the pattern pieces dramatically.  You can see the changes below:

My pattern back compared to the real pattern.

My pattern front compared to the original.  It has been redone so many times the tissue is totally reinforced by tape.

My sleeve compared to the real pattern piece.

Sunday, November 3, 2013

Raglan Sleeve Fitting Nightmares.....Simplicity 1615

Simplicity 1615

Pattern:
Simplicity 1615, View B
There is not a thing wrong with this pattern, except it fit me horribly.   I could tweak a muslin to fit me, but just could not transfer the correct changes to the pattern to make this work. 

 I am glad I  hit a road block.  It sent me on a fit journey that will in the end make me much happier.  

As a note, this pattern runs large.  I did go down one whole size to start the fitting process.  I thought I had the fit perfected, but after construction found that it is still too large across the shoulders, which also makes it too large across everywhere else.  If I didn't have a stack of projects waiting, I would remake this top with my new fitting and drafting knowledge and it would fit.

Fabric:
Turquoise voile by Free Spirit Fabrics.  
My one regret of making this top is the sacrifice of this wonderful fabric.  
Feels like a silk, but it's cotton.


Conventions and Classes, Oh My!

My head is bursting with wonderful ideas for garments after a week of SAGA Convention, International Quilt Festival, and a Lyn Weeks class.  (All in less than 2 weeks!)  I was horrible at taking pictures of what I learned or made.  The most fun was meeting all those blog friends I have made over the last few years!   I did get a few pictures, so here goes:

SAGA Convention held in Frisco, TX

Vaune Pierce attempted to teach me to smock sideways.


I almost finished a pillowcase in Carol Ahles' class.
Judith Adams and myself

My smocked cupcake towel with Judith Adams.


Gail Doane after a long day of teaching us about collars.
A Texas style "Ding Dong"
Lyn Weeks and my completed hanger.
At SAGA and IQF, I bought some lovely fabric……like Japanese pique, chambray, and yarn dyed fabrics.  Vogue Fabrics sucked me into their booth and I could hardly carry the fabric around the convention center.  Sew It Up has some new lacy fabrics that aren't on their website yet.  After a summer of work, I had carved out a small hole in my sewing room.  
In two weeks, I have managed to fill it! 

Off to work I go!

Saturday, October 12, 2013

Fall Tops for my Girl

Butterick B5913

Patterns
Butterick B591,3 View C
McCall's M5693, View A

Fabric
Floral knit from Chez Ami
Apple print from my quilting cotton stash along with a scrap of denim

Constructions Notes
B5913 runs very short.  If you add at least 2" to the bottom of the skirt, it will also make construction much easier. At it's current length, the bottom of the sleeve and the top hem are at the same spot.   I also used fold-over elastic instead of a self-fabric neckband.

M5693 was done according to the pattern directions.  The front slit is pretty low and for modesty, one needs to wear a camisole.  Less slit..........

McCall's M5693
McCall's M5693

This is the start of fall sewing..............

What are you making?


Sunday, October 6, 2013

Ruffle Top by Christine Jonson PatternsN

No. 419 Christine Jonson Patterns

Pattern
Ruffle Top by Christine Jonson Patterns
Pattern is very easy to follow directions and construct. 

Fabric
Polyester knit from Hancock Fabric
This fabric is not a great quality, but fine for a quick test run of this pattern.

Conclusion:
I made this top in the late spring and it got too hot to wear or model.  Our first breath of fall and temps below 90 degrees, brought out this top.  The knit fabric is textured, so the crossover is a little bulky on me.  Christine Jonson has directions on her website to make this top a little more modest, so I can drop the camisole under it.  I do want to make another soon!

Ruffle Top with a little wind, but you can see the ruffles better.

Saturday, September 28, 2013

Quick Skirt Day, Simplicity 4881

Twinkies!  Simplicity 4881


Pattern

My skirt - Simplicity 4881 (View A) with Simplicity 2449 waistband.  Simplicity 4881 is a great simple skirt pattern for a skirt with only side seams.  Due to the print, I didn't want it broken into too many pieces.  
My daughter's skirt came about when I found I had about 15" of fabric left after my skirt.  So, I took the 15" and gathered it and coverstitched it to a black elastic that I purchased from Sew It Up.  The black elastic waistband was a great quality. I simply flat felted the seam of the elastic and added the gathered skirt.

Fabric

Rayon print from High Fashion Fabrics in Downtown Houston.  I was the first to buy off the bolt a few weeks ago.  I ran by there today for a few other items and this bolt is GONE.

Construction Hint

Rayon is a wonderful drapy fabric. but keeping it aligned on the cutting table can be tricky.  To make life easy, I laid out my butcher paper.  Pinned the fabric to the butcher paper.  Cut out the front of the skirt.  Did not unpin anything.  Moved the sandwich of butcher paper, fabric and pattern piece to where I wanted to cut the back.  I could then line up the prints without chasing the fabric all over the cutting table because the butcher paper gave me stability.  Cut out matching pieces in about 10 minutes.


Waistband from Simplicity 2449

My daughter's skirt with black elastic waistband.

PS - My daughter really liked this skirt.  All her friends dress in polyester.  The cute cottons are starting to bother her.

Saturday, September 21, 2013

My Fit Journey

All master skills are a journey, not a weekend class.  Fitting garments is a journey for me.  I have not arrived, yet.  The last few weeks have been a leap forward on the journey.

Fitting Fallacies I have heard. Learned through experience they are not completely correct:

  • Find the right size pattern, most sew the wrong size.  
  • All patterns from the same company will fit once you find the company that is most like you.  
  • Once you find the correct alteration, you will do the same one on each garment.
My frustration reached an all time high recently with a simple top that I could not fit in the sleeves.  I started with my normal size 14, but it was larger than a maternity top.  So, down to a 12 and still fit issues.  That lead to a little more research and the idea of remaking a muslin sloper.  It really was an experience from, "If you give a Mouse a Cookie."  One thing led to another and before you know it, I had some great answers.

High points on my recent fit journey:
  • Moulage = skin measurements = skin tight garment
  • sloper = moulage plus enough room to move
  • pattern = sloper plus design ease to make a fashionable garment
So, coming up with my sloper would give me a visual picture in pattern form of what I look like.
  • I redrafted my Vogue 1004 sloper about 6 times before I was satisfied with the fit.
This is the HARDEST part, coming up with a good sloper.  After I finished this trick, I found Kenneth King's "The Moulage" CD, which could  have made this process easier.  To help me through this phase I relied on some handy resources.  
  • Fit for Real People by Pati Palmer and Marta Alto
  • Fitting and Pattern Alteration by Liechty, Rasband, and Steineckert
I found through this process that I have:
  • slopping shoulders
  • one shoulder slopping 1" more than the other
  • miraculously, both shoulders are the same width
  • full bust
  • near normal waist and hips for a size 14
  • forward rotated shoulders
  • rounded upper back
  • lower shoulder needs more height due to being thick......who would have thought 
  • outward rotated elbows
My crazy shoulder outline

Now, it would be lovely if someone would catalog all the adjustments in one place. Currently, you must shuffle through all your fit books to figure out the why's and how's.

So, now I have my sloper drawn on tissue paper.  I added the seam allowances.  Through all this research I found an old article in Threads on using your sloper for altering commercial patterns.  This led to Lynda Maynard's CD De-Mystifying Fit.  (Highly recommend her products.)

So, if you followed the "If  you Give a Mouse a Cookie" trail through this, you will see I have a sloper and the tools to alter commercial patterns before I cut my first muslin.  

What I did with my new knowledge and tools:

I had on my cutting table a knit dress that I had constructed before.  It didn't have a lot of fit issues, but I wanted a garment that I could wear all day and not pull or tug it back into position after I moved around.  

So, Butterick B5778:
I marked the bust point on the pattern and a vertical matching spot on front and back.  This pattern is above the waist.  To have enough height to reach my shoulder, I added about 1".  I added it to the bust, since I know this is a B cup pattern.
This pattern has three pieces across the front, so each had to be adjusted in height.  You can see where the bottom dart matches my sloper.


The back was too short.  I added the 1" plus a little more for the rounded back.    I ended up cutting off a little in the back during construction.  
I hope you can see the crazy shape I have on this sleeve cap.  It solves the forward rotating shoulder issue.  I moved the center top mark to match my center top mark on the muslin.  


My Results

I used all the length adjustments and shoulder adjustments from my sloper to the Butterick pattern.  Since I had made this dress before, I knew the width was not an issue.  I did take off a little of the shoulder length, so the sleeve looked correct.  This pattern has an off the shoulder sleeve, but it also was a shaped sleeve.  It looked so dorky.

Wow!  So glad I chased that mouse!
This dress fits wonderfully.  I wore it all day and never pulled or repositioned it.  
People wanted to know how much weight I had lost!  None, just found that clothes fit better when the bust, waist, and hips are where they belong!


Butterick B5778
The results were fabulous!
Back view of B5778


Can't wait to work on a few more projects using this information!!!  The fit tools I learned still do not let you skip making a muslin, but you will be so much happier with your first try!


PS - My daughter is in the middle of her gymnastics season.  A few pics from the last few weeks.


Mary Lou Retton handing out medals.  She won Olympic Gold 20 years before my daughter was born.   My daughter had to have a detailed explanation of who this was to fully appreciate the moment.
A beautiful cartwheel handstand on beam.

A happy third place all around finish!