Friday, December 31, 2010

Christmas PJ's for Girl and Doll

I wonder about my sanity when I take on a project like this between Thanksgiving and Christmas.  My daughter fell in love with Rebecca's PJ outfit from American Girl.  (pictured above) Being the crafty mom, I decided to make it, not buy it.  My local heirloom shop, Buttons and Bows, had just gotten in the Lily and Will fabric line from Moda.  I thought it was a good match for my project.


The robe pattern is by Favorite Things and is called"the robe."  I only added the pleated satin trim, satin lapels, and ribbons to make it girly.


I love the tie on this robe, it is sewn on and won't come off the robe.  No more complaints about lost ties.


The girl PJ's pattern is Gigi by Children's Corner.  I added the blue ribbon and bows.  I made a size 8 for my six year old.  The outfit is a little large, but not by much.  


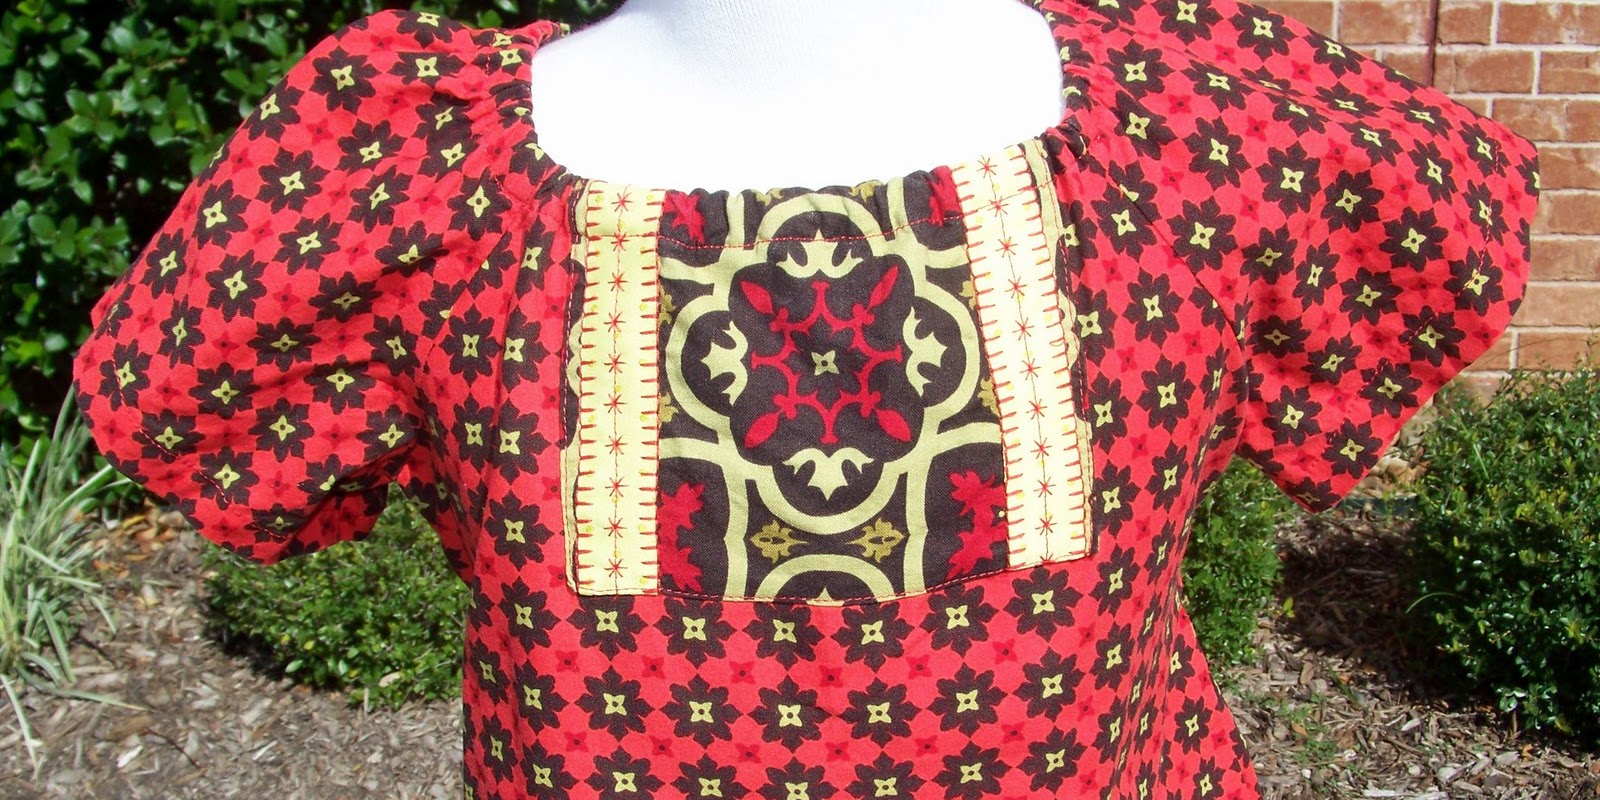
This is a close up. I love the details on the sleeves.  It is so stylish for the time period of Rebecca.


I had a little extra fabric and I put together Girly Gown by Hope Yoder.  The gown went together in 30 minutes.  Loved  the quickness, but it is a little big for my daughter.  I think I made a size 8.


The robe was lined by the blue quilted fabric in the Lily and Will fabric line.


This is my version of Rebecca's PJs.  The robe is from McCall's M5019.  Above on the right is the American Girl store outfit.


The PJ pattern is from Simplicity 5276 with a slight gathering of the legs to make it reflect the Gigi pattern.


The Girly Gown pattern comes with 18" doll version, so her is one to match the big girl.  This too went together in no time.

My daughter loved her new PJ and robe combo.  She slept in it almost the whole Christmas vacation.  I hope you enjoy the pictures.


Friday, December 17, 2010

Christmas Play Outfits from Sassy Skirt by Children's Corner


This skirt it Sassy Skirt by Children's Corner patterns.  I kept the yoke from the pattern and redid the skirt to highlight the cute Christmas Michael Miller fabrics.  I have talked about why I love this skirt in another post.


I cut strips of fabric into 4" by 12" strips and then sewed them together for the skirt.  I added a hem band to finish off the outfit.  The t-shirt is from Target with Planet Applique's Ornament Alphabet Applique.  I made these at Thanksgiving, so I am trying to remember, but I think I used the 6x10 embroidery for the shirt.  It did not look like the print out from Planet Applique, but I think I like it better, it matches the scrappy fabric from the skirt.


This is Sassy Skirt in view B with an added hem band.  The embroidery is from LynniePinnie.com and is called Retro Christmas Trees.  They match the Michael Miller Christmas fabric exactly.  


These are great additions to my daughter's wardrobe to wear to fun parties and family gatherings. I can save the smocked outfits for times when we won't spill food or climb trees.  

Friday, December 10, 2010

Serendipity Studio Catherine in a Christmas Jacket


I am so in love with this jacket pattern, the Catherine Coat, by Serendipity Studio.  I am so pleased with the results of the sewing, but it was a journey to finish.  A few years ago, I had found this lovely red and black crushed velveteen at a bargain price.  I even have it in a beautiful green, which may be next years' project.  I decided to tackle something for me for Christmas with those fabrics.  After searching through my patterns, I pulled out the jacket pattern, the Catherine Coat.  I also used the yoke from Simplicity 2410 for the skirt. 

As you can see the jacket is a great fit.  I made a large size and was concerned about the fit (ok, I didn't make a muslin and I usually do).  I have made her skirts in a large and ended up taking it in by a few inches.  The gathering in the bodice was just enough without being too much.  The gathering in the sleeves was just enough without becoming a puffy sleeve.  The length was just right and hits right at the hipline.  The pattern has three hem lengths and a few options on the embellishments.  The only interesting note is the cuff is not a pattern piece, but a simple statement about if you want a large or small cuff, cut this size.  I chose the larger size due to the fabric type.  Looking back, I could have gone either large or small.  The jacket is not lined, which was a great choice for this project.  This jacket would not be worn with another shirt underneath, so even using it for something else would not include a lining.  (Hope this helps someone thinking about constructing one themselves.)


I chose to use black silk shantung for the collar, belt, facings, and trim around the cuffs.  I also used it in the underside of the red collar.  I referred to my trusted Sandra Betzina book, Fabric Savvy.  It said to use a walking foot or a roller foot.  I think I slept between reading and doing and used a teflon foot.  It sure was a pain to even sew a straight seam.  My sweet advisors on the Delphi website reminded me that I needed less pressure, not even pressure on the foot.  A good lesson I won't forget to use when I get around to the green velveteen.


I found these lovely silver buttons at the International Quilt Festival in Houston.  I was determined to use them, but after trouble sewing a straight seam, I was distraught at the thought of buttonholes.  (Even more distressing was the thought of bound buttonholes.)  I tested a sample on a scrap and had no problems.  Was it possible to easily sew in a buttonhole without stabilizer or anything special?  YES!  I did choose a jacket buttonhole stitch on my Viking sewing machine, but that is all I did for better than expected buttonholes.


I will review this cute skirt pattern later, but this is Simplicity 2410.  I love the fit of the waist.  It has a side zipper (I used a black invisible one).  I gathered the skirt and stitched it to the waistband.  It is so soft and comfortable to wear.  One note about crushed velveteen, the black fabric has a shimmer to it and it doesn't matter what I do, the hem looks crooked due to the shimmer of the fabric.

I am very pleased with the results of this jacket and I look forward to using the other jacket patterns from Serendipity Studio.

Friday, December 3, 2010

Smocked Christmas Dress


This cute dress is a smocked bishop pattern from Australian Smocking and Embroidery.  I used a size 5 from Beautiful Bishops and then smocked it using the Ring of Roses pattern from Sew Cute Couture.  I have found that most of the traditional bishop patterns can be used interchangeably with AS&E.  Since this was very traditional, it was an easy swap for the size I needed.  I have found the AS&E's bishop pattern fits my daughter well and has just the right amount of puff in the sleeves and ease around the bottom of the dress.  The accent candy cane fabric was used around the bottom to add another whimsical element and it is trimmed with red and white whipped stitched piping.  This type of piping requires a good ironing after each wash.


This is a picture of the original dress, made only to a size 3T.  I know they look worlds different, but I think even Gain Doane (original designer) would be delighted by reusing a pattern in such a different way.  I fell in love with the whimsical Christmas print, but was stumped on how to smock it.  It needed lots of thread coverage to give it balance and cover the fabric that showed bits and pieces of the stars in the pleated fabric.  This pattern of Ring of Roses was perfect.  It has great coverage and is very fast to smock.  I dropped the roses from the original pattern and added just a button on each heart.  It really made the smocking match the candy cane stripe in the accent fabric.  


This is an up-close of the smocking.  I used red, lime green, and hot pink thread.  


The back is finished simply with red buttons all the way down the back.

My daughter looks just as cute as a button in the dress or you could say as sweet as a candy cane.


Friday, November 26, 2010

Cool Weather Jacket that is sooo Cozy...McCall's M4961


I knew I needed this pink ultra-suede and berber backed fabric when I saw it, but what do you do with it.  It sat in my fabric storage for a year or two.  Then I got the courage to work with it.  This pattern is the simplest jacket pattern I could find, McCall's M4961. I was looking for straight lines and few seams. 


I followed Sandra Betzina's directions for suede in Fabric Savvy.  Thread: Polyester, Stitch Length: 3.0mm, Walking Foot,  Seam Finish: Fake Flat Fell.  I did not dare make a button hole, so I cut squares of the fabric and turned the ends over and topstitched them into place.  Then added the toggle buttons and leather loops.  


My topstitching was not perfect, but I had never taken on such a fabric.  It appears that the ultra suede was interfaced to this fuzzy berber.  All the trim is just the fabrics underside of berber.  It is the softest coat and it was already self lined.


I picture of my inside seams.

attern Description: CHILDREN'S AND GIRLS UNLINED COATS AND HATS: Coats have button closures; coat A has fake fur; coats B, C, D and E have pockets, cuffs and stitched hems

Pattern Sizing:Girls X-Small - X-Large

Did it look like the photo/drawing on the pattern envelope once you were done sewing with it?yes, It shows multiple views of almost the same jacket. Mine had pockets.

Were the instructions easy to follow?yes, but my fabric choice led me in to a different construction.

What did you particularly like or dislike about the pattern?Simple lines for fabric that may not be the easiest to work with.

Fabric Used:Pink ultrasuede with a berber interfaced underside. I purchased it this way.

Pattern alterations or any design changes you made:I followed Fabric Savvy's advice by Sandra Betzina for ultrasuede. Longer stitch length, walking foot, and most importantly the fake flat fell seam. This is done by sewing a normal seam then trimming one side. The longer side is then folded over the short seam and folded and topstitched in place. This solved my seam finish problem with this fabric. Since the underside was a berber, you can hardly see the seams from the inside. Instead of button holes, I choose to sew little squares on the jacket and flip up the sides and then topstitch it. I was not familiar with sewing on this fabric and was a little worried about the outcome. Fortunately this is one of my better experiments. (My recent experience with crushed velveteen was not.)

Would you sew it again? Would you recommend it to others?This is a simple jacket and is great to try with an interesting fabric choice. If you make it of a solid fabric, it would be boring and I would choose something with more details.

Conclusion: A winner of a project with ultrasuede!

Friday, November 19, 2010

Fall Lillian Jumper


 Lillian is a very easy jumper to assemble.  It has three outside (fashion fabric) pieces and 3 lining pieces.  It goes together in less than an hour.  The fabric is a Robert Kaufman corduroy print.  I tired to anchor the busyness with red ribbon, but the print was so busy it was hard to get a great photo.  It doesn't look so crazy in real life.


The back is simple with buttons all the way down the back.


Lillian comes with a square pocket.  I wanted something fancier, so I grabbed the last pattern I had done with pockets and added Modkids Frida pockets without the elastic.

Pattern Description: Lillian is a sleeveless, lined shift dress that buttons in the back. It has short slits at the bottom of side seams for easier movement trimmed with fabric or ribbon bows. Patch pocket can be trimmed with rickrack.

Pattern Sizing:Sizes 3-12 in one package. I made a size 7.

Did it look like the photo/drawing on the pattern envelope once you were done sewing with it?Yes

Were the instructions easy to follow?Yes

What did you particularly like or dislike about the pattern?This dress has 3 fashion fabric pieces and 3 lining pieces. The assembly is fast and easy. It is cut to fit through the shoulders. It also does not A-line out so far that it looks like a baby outfit.

Fabric Used:Robert Kaufman corduroy

Pattern alterations or any design changes you made:The pattern comes with a square pocket and I wanted something snazzier. I grabbed the Modkid Frida pattern and used their pocket. I didn't add elastic, but ribbon along the top pocket.

Would you sew it again? Would you recommend it to others?Yes. It is great without a shirt in the summer and cute with a shirt underneath in the winter.

Conclusion: Great, easy pattern for summer or winter using very subdued fabric or WILD fabric. Great versatility.


Friday, November 12, 2010

Oliver + S 2+2 Blouse and Pleated Skirt plus some fall t-shirt variations


This is a cute outfit from Oliver + S.  It is the 2+2 Blouse and Pleated Skirt.  The fabrics are from www.Sewitup.com.   Lorene Bonewitz from SewItUp.com is great at matching some of the cutest fabrics.


The placket on the shirt looks difficult, but is very easy to put together.  


To extend the life of the bright orange skirt, it became a great fall/Halloween/Thanksgiving outfit.
I bought the cute embroidery pumpkin from www.PlanetApplique.com.  It is called the Double Pumpkin Alphabet.  They made theirs in cute fall colors, but we HAD to have a pink "M" on ours.


While I had my embroidery arm attached I whipped out these other two t-shirts.  
I am in LOVE with all the cute owls that are out there this year.  This design is from www.StitchInTime.com.  This design is called "Owl Mommy, Brother and Sister."


The owls in the tree are from www.StitchInTime.com.  This one is named "Monroe Owls."

Pattern Description: A-line blouse sewing pattern features neckband ties, gathered front with applied patch, and button back, options for long and short sleeves. Pleated skirt sewing pattern has hidden snaps at side placket, button-loop closure on waistband, and elasticized back waistband.

Pattern Sizing:Sizes 4-8

Did it look like the photo/drawing on the pattern envelope once you were done sewing with it?Yes

Were the instructions easy to follow?Yes, my only problem was the snap and button on the waist band. (I had spent all day in the kitchen cooking and was relieved to sit and sew, but I am not sure I was all mentally there.)

What did you particularly like or dislike about the pattern?I loved the detailing on the blouse. The placket was done beautifully.

Fabric Used:The fabric was purchased as a kit from www.sewitup.com. The top is a cotton bloadcloth/pima and the skirt is baby corduroy.

Pattern alterations or any design changes you made:I think I made a size 6. My daughter is very thin and I didn't use much elastic in the back of the skirt. It does make the skirt wider in the front than the back, but what can you do for those skinny girls. My daughter is also tall and I have found that Oliver + S runs short on her. I usually make the skirt longer, but I don't think I did with this one.

Would you sew it again? Would you recommend it to others?Yes. It looks time consuming, but it really went very fast.

Conclusion: As you can see from my blog, I have reused the skirt for the fall holidays. So, a cute skirt and shirt can go along way in a little girl's wardrobe.


Friday, November 5, 2010

Nina by ModKids and Sassy Skirt or "What do you do with 1/2 yard cuts in your stash?"


I had found some super cut prints and ribbon from Patty Young's collection of Andalucia.  The fabric has long since been discontinued, so those 1/2 yard cuts would have to make due.  I came up with a t-shirt and skirt combo and a Nina shirt and embellished jean combo.  Both can be mixed and matched for two complete cute outfits.  


Sassy skirt by Children's Corner without the double layer skirt.  The t-shirt is from Target and the embroidery design is from Stitch in Time and is called hillhouse8.  


Nina shirt by ModKids with Target jeans and Andalucia ribbon and ruffle.


This is a close up of the shirt.  I used yellow ribbon from the collection and a decorative stitch from my machine to add the details on the front.


The shirt has a simple tie back.


The embellished jeans!

Pattern Description: This all-seasons top can be made as a sleeveless tank with tie-straps for the Summer, short-sleeved for the Spring & Fall and long-sleeved for the Winter. It has a sweet peasant style and several options for embellishing the top. As a bonus, we’ve included easy step-by-step instructions and diagrams for making our no-pattern Easy Peasy Skirt, as seen in the front cover. Pair up your favorite version of the Nina top with our Easy-Peasy Skirt for a complete boutique-style ensemble!

Pattern Sizing: 2T to 7

Did it look like the photo/drawing on the pattern envelope once you were done sewing with it? Yes

Were the instructions easy to follow? Yes

What did you particularly like or dislike about the pattern? It is a cute top for little girls that goes together quickly. There is little fitting, so it looks home sewn. To make this really cute, you need an idea for the front square section (ribbon, embroidery, or buttons).

Fabric Used:I used 1/2 yard cuts for two whole outfits that coordinate. I had purchased these cuts a year or so ago and hadn't used them yet. The line, Andalucia, has been discontinued so I had no hope of adding to the fabric. I searched through all my patterns looking for a way to turn these cute fabrics into something useful.

Pattern alterations or any design changes you made:I used view C, which is short sleeved (didn't take a lot of fabric). I added ribbon and a cute stitch from my machine to add some detailing.

Would you sew it again? Would you recommend it to others?I used this pattern to get around that 1/2 yard cut and it worked.

Conclusion: I like the two outfits and their cute looks. I did not use the skirt pattern on Nina due to the yoke of the skirt being a rectangle and my other review of Sassy Skirt by Children's Corner goes into the reason not to use this.


Friday, October 29, 2010

Sassy Skirt by Children's Corner


Sassy Skirt from Children's Corner view B

This is a close up of the crazy butterfly I added to the Target t-shirt to tie it together.

Pattern Description: Sassy Skirts is a collection of three skirt patterns designed by Susan Whitman. View A is a double-layered under and top skirt cut on the bias. The skirt is attached to a lined skirt yoke and has elastic at back of skirt. View B has a slightly gathered skirt and is completely lined. It also features elastic at the back waistline. View C has a single layer bias skirt. View C is completely lined and has elastic at the back of skirt waistline. Optional belt loops and sash can be added to all patterns. Instructions are included for belt and belt loops.

Pattern Sizing:This pattern is available in sizes 3-5 and 6-10.

Did it look like the photo/drawing on the pattern envelope once you were done sewing with it?Yes

Were the instructions easy to follow?Yes, but you will have to be in a quiet room and thinking or you will be ripping out the underskirt when you attach it.

What did you particularly like or dislike about the pattern?I LOVE this pattern on little girls because the waistband FITS. So many patterns have a rectangle cut for the yoke of a skirt. This one is shaped and the back has elastic allowing the front to hang smooth and not bunched up around the waist.

Fabric Used:This is a quilting cotton from Patty Young's Flora and Fauna collection with a t-shirt from Target.

Pattern alterations or any design changes you made:I made the skirt in view B without the belt ties. To tie the outfit together with the shirt I wonder undered one of the butterflies to felt and added some matching ribbon and rick rack.

Would you sew it again? Would you recommend it to others?YES!!! This IS the pattern to use for little girl's skirts!

Conclusion: I will use this pattern or at least the yoke for all dropped waist skirts for my daughter. No more rectangles that don't fit well.

Friday, October 22, 2010

Sweet Arabella from Australian Smocking and Embroidery, Issue 73

This is a great fall dress.


The dress form pushes this little dress to its limit.  But the back view lets you see the collar well.


This close-up gives you a good look at the different colors in the smocking.  


Pattern Description: A square yoke dress with a smocked front. The collar has gathered ruffles and piping. The sleeves are puffed and there is smocking to hold the sleeve up.

Pattern Sizing:Sizes - 3, 4, and 5 years. These are Australian sizes, so they run very large. I made a size 5 and most normal 6 year olds could wear it.

Did it look like the photo/drawing on the pattern envelope once you were done sewing with it? Yes, it is a lovely dress. I used a totally different color scheme than the original pattern and smocking, but I was very pleased with the results.

Were the instructions easy to follow?
Yes. Australian Smocking and Embroidery have easy directions for any intermediate sewer. This issue had a page of illustrations on how to put on the ruffled collar. That is a great help, since it is a lot of fabric in a very small space.

What did you particularly like or dislike about the pattern?
I really like the smocking design with the gap in smocked sections. It hangs on my daughter so well. The collar also looks great. I almost cut it out because I knew it would be difficult to make this look good.

Fabric Used:
I fell in love with this purple quilting cotton and finally found the great fall project for it.

Pattern alterations or any design changes you made:
none

Would you sew it again? Would you recommend it to others?
I usually don't sew two smocked garments alike, but this is a favorite.

Conclusion: Great directions help make great garments. This is a great example.